One of my aims when signing up for the Vintage Pattern Pledge was sewing a dress for the colder seasons as opposed to cute sleeveless summer dresses in colourful cottons. Not that I don’t like those, there just aren’t that many opportunities to wear dresses like that here in Sweden. My first choice was Butterick 6282, a reproduction of a pattern from c. 1941 that comes in two different views: one long-sleeved version appropriate for autumn and winter and one summery version with elbow-length sleeves.

Image source: butterick.mccall.com.
I planned on sewing view A in tealish blue needlecord, but after cutting out the paper pattern I started having doubts. I was afraid that the colour would make it look like a KLM air hostess uniform. While sorting out my stash I found two smaller pieces of velour that together could form a dress. The pattern pieces of Butterick 6282 did not fit, but a vintage Swedish pattern in my stash provided better possibilities: Vi-Mönster 3313.
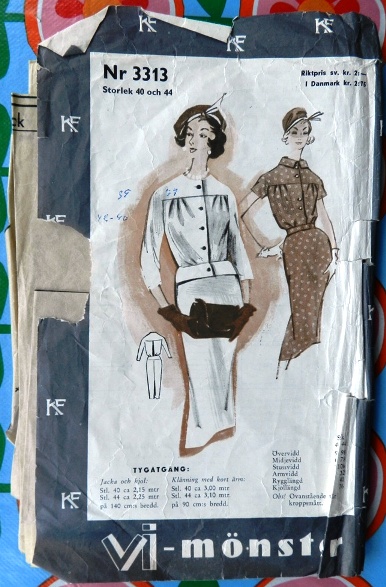
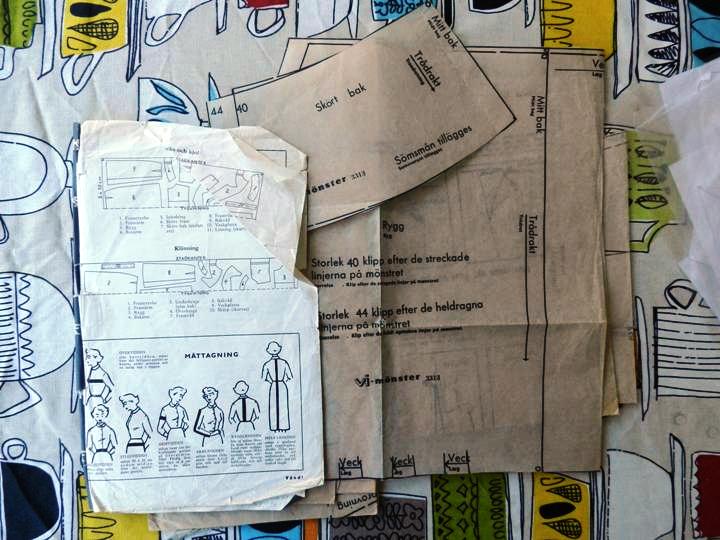
This is a pattern for a skirt suit or a dress. It was the construction of the jacket that caught my attention: the yoke that extends into the sleeves, the loose-fitting mid-section with gathers or tucks in the front and a pleat in the back and the peplum. The slim skirt has a back pleat too. The envelope is tattered, but the pattern itself is in good shape. It is printed on sturdy paper and multi-sized, so it is very user-friendly.
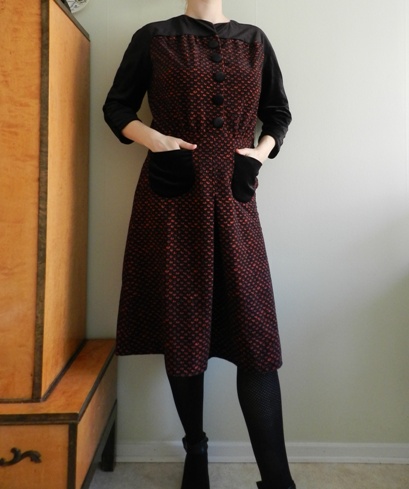
The pattern is undated, but the yoke/sleeve feature reminded me of some late 30s and 40s patterns. Although I don’t think my pattern is that old, I decided to go for an early 40s look. The slim skirt was exchanged for the shorter, more flared one of Butterick 6282. I wasn’t sure how tucks were going to work with the floral fabric and did not have enough for the back pleat, so I gathered the bodice to fit the yoke and skirt.
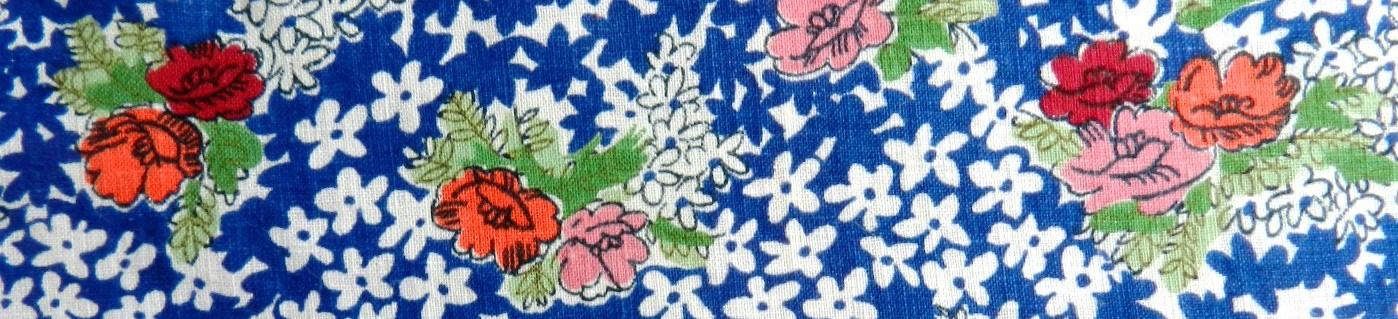
The black stretch velour – probably a polyester/cotton blend – was one of the earliest fabrics that I bought myself. I don’t know what past me was thinking, but I had randomly cut out two sleeves without realizing that I didn’t have enough fabric left for the rest of whatever top I was planning on making. Fortunately, this awkward-size piece of fabric was just big enough to fit the yoke/sleeves of the present dress. There was a bit more of the floral fabric, which is entirely synthetic, but still not enough for a dress or a full skirt by itself.
Although the pattern was close to my size, I added some width to the bodice and, of course, lengthened it with about 3cm. To be honest, I feel ambivalent about blousy bodices like this one and the one that comes with Butterick 6282. They are easy to make and easy to wear, but perhaps not that flattering. Next time I use Vi-mönster 3313 will make sure to add the tucks, back pleat and possibly a few darts to make the bodice more structured. Not sure what to do about Butterick 6282, though!
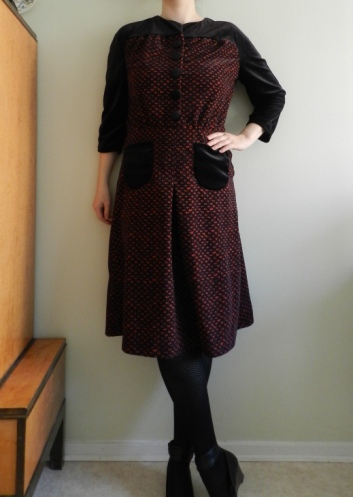
Most of the cutting and sewing was done in a week. The four corners in the yoke required some attention, but were not too tricky once I got the hang of it. The project stalled when I first tried on the almost completed dress; I thought it looked frumpy. In addition, I couldn’t find any suitable buttons in my stash. After a short break, I simply shortened the skirt and sleeves, which was a huge improvement for the overall look.
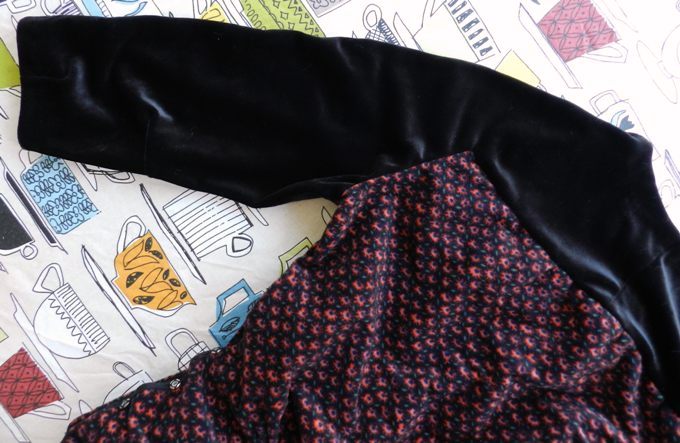
The yoke with one of the corners. The sleeve features darts at the elbow and cuff.
The button problem was solved when I remembered the cover button kit I bought for a mere 20 sek (a bit over 2 Euro) at (Flying) Tiger. I used the black velveteen to cover the buttons, so they match the dress perfectly. This was my first time making covered buttons and it was surprisingly easy. Let’s hope that they won’t fall apart after a few wears, as I have already bought one more kit.
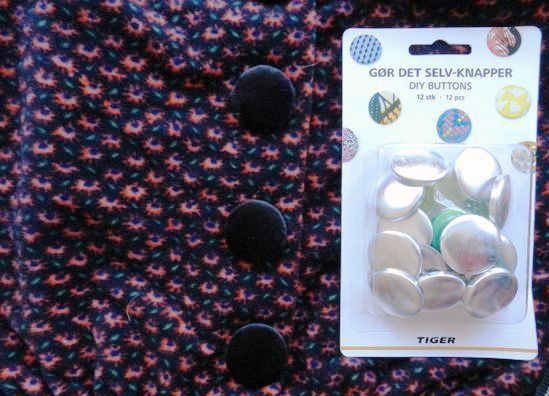
Fabric covered buttons and the “DIY Buttons” kit (this unopened package was bought a couple of days ago, because I like to hoard supplies).
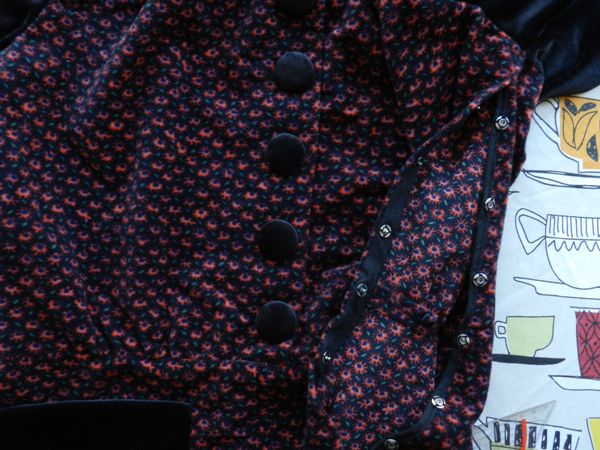
Side closure with sew-in snaps.
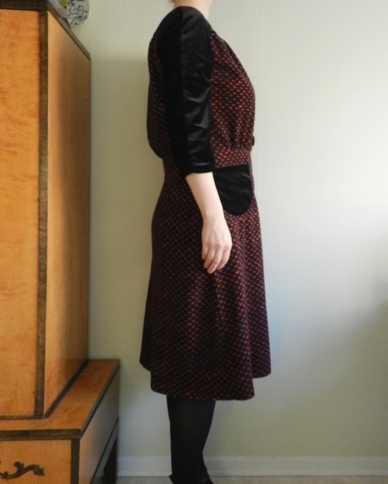
Because I couldn’t find a zipper of the right size in my stash, I opted to use sew-in snaps for the side closure – an idea that I took from the instructions for Butterick 6282. I didn’t follow the instructions, but improvised with bias tape to which I sewed the snaps. It was time consuming, but I like how it turned out.
Demonstration of the side button closure.
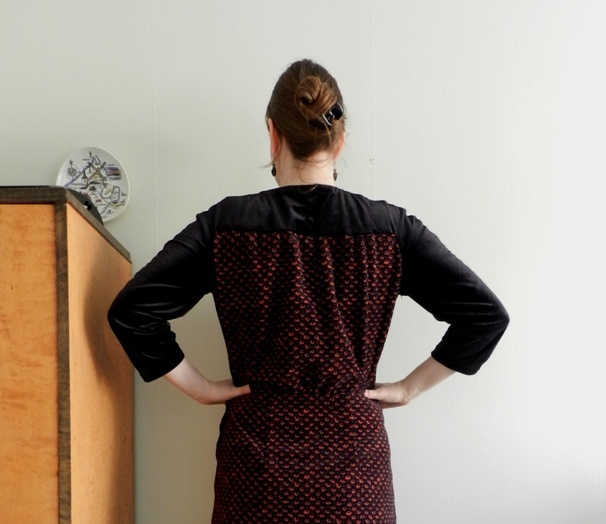
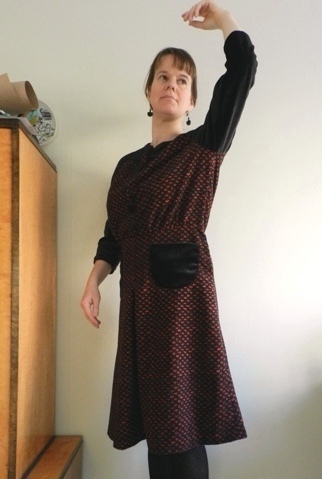
The two things that bug me when looking at the pictures are the placement of the pockets and the neckline. Looking at the drawings of Butterick 6282 it is clear that the sides of the pockets should be placed closer together, so they open up a bit. Mine are too wide/flat. This is, however, easily fixed, because, in an ultra lazy move, I sewed on the pockets using the blind hem foot, so there are not many stitches keeping the pockets in place.

The neckline looks really good when the dress lies flat, but when wearing it moves around and looks floppy. Perhaps I will add a sixth button to keep the yoke in place. In my defense, black velour is difficult to photograph and I think that the pictures of me wearing the dress show all the folds and creases in the yoke because of the way the lights hits it. It looks better in real life!
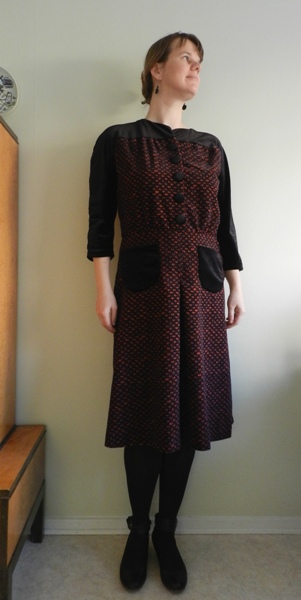
Overall, the dress came together painlessly and I am happy with how it turned out. It also feels good to finally have found a use for two odd fabrics in my stash. I am very inspired to find more patterns that are suitable for combining relatively small pieces of fabric.
Materials
Black stretch velour: probably the local fabric store that is long gone
Floral velour: charity shop
Aluminium cover buttons: (Flying) Tiger
Bias tape and snaps from stash
Looks not frumpy at all but really elegant 🙂 I really like the drape of the fabric also, looks great with this kind of skirt pattern.
Thank you, I’m glad you like it. The dress is very comfortable and warm, so definitely a practical dress, but it’s nice to hear you think it’s elegant!
Pingback: 2016 vintage pledge completed! – IrisArctica
Pingback: After the break – wardrobe update part 1 – IrisArctica
what does the acronym cbd stand for